
Wednesday, May 13, 2009
DTS Passthru In Handbrake!
Finally we have DTS pass thru for mkv containers in HandBrake!! Its still not an official release but a SVN (unreleased subversion) has been posted. If you know how to build your all set, if you don't, no worries. If you would like to download it I have it hosted here. Handbrake SVN2413 Official release probably a few months away.

Tuesday, May 12, 2009
Plex Issues with some 1080p content
Back with the release of Plex 0.7.14, FFmpeg 0.5 was introduced. Its seems that this introduction of FFmpeg may be the reason for the current playback issues in Plex, mostly with 1080p content. After much prodding on the Plex forums the issue seems to have finally gotten some attention, strangely enough from an XBMC developer. (XBMC uses the same FFmpeg as Plex). You can read about it here:
Plex Shudders and drops Audio with some 1080p content
A support ticket was also created over at XBMC here: XBMC Support Ticket
Hopefully after the XBMC guys isolate the issue it will be reported to FFmpeg guys, and the fix will eventually trickle it's way down to Plex.
A little more history on this:
After updating from 0.7.13 to 0.7.14 I experienced skipping of video and dropping of audio, none of which happened under .13.
This issue has followed Plex in its latest .8.0 release aswell.
So for me I stay at 0.7.13 where my content plays more consistently.
Plex is my preferred application, but I may investigate XBMC a little more.
UPDATE 5.22.09
It seems we've been making some headway with the issue. Some time within the next day, Elan and the other Plex developers will be releasing 0.8.1. A reversion back to the earlier VC-1 decoder as well as some "special sauce" to speed things up in Plex.
Monday, April 20, 2009
Controlling Everything: OS X Screen Sharing & Remote Control

Screen Sharing
One of the coolest things you can do In Leopard 10.5 is screen sharing. basically I can control all my macs from my one laptop (my MacBook Pro). I commonly use my QuadCore Mac Pro to do a lot of my encoding. Screen sharing makes this easy for me to do right in my living room as My Mac Pro is out in my studio and would take sometime getting to. Transferring the finished encodes to the Mac Mini can be done via screen sharing aswell. Controlling anything involved with the Mac Mini. Even controlling Plex. Anyway.. on the mac(s) you want to control, enable screen sharing by going into System Preferences->Sharing and check on screen sharing. Back on the computer you will be controlling, open the finder and under Shared you will see your other Mac(s), select and choose to "share screen".
 Controlling Plex and/or the mini with my iPhone.
I decided to use and iphone app called Air Mouse. Check it out for yourself, its very easy to setup and use. I can control Plex and the Mac Mini right from my chair.
Saturday, April 18, 2009
Mac Mini bitrate max for 1080p and DTS Pass Thru
The Mac Mini 1.83ghz and Plex (0.7.13) have trouble playing anything with a bit rate over 40mps. while it can handle small spikes into the 30s, it will soon drop frames as well as cause audio drop outs and sync issues when peaking in the 40s. So any Blu-ray with bitrates that climb over 40mps will need to be re-encoded with a cap on bitrate. Understand that there are many other factors that come into play when playing back video, biterate is just one of the many factors im focusing on.
(note: Plex 0.7.14 has introduced issues with playback of some blu-ray 1080p material.)
After working with AnyDVD HD and TSmuxer to get the full quality m2ts ripp, see if you can play it. If the movie has bitrates that don't climb over 30mps you may not need to re-encode. But if you have issue..
Capping the bitrate:
Handbrake is the app I use to encode video. The only problem with Handbrake is that there is currently no DTS pass Thru, although AC3 passthru works just fine. (update the next release of Handbrake will include DTS pass thru for MKV containers)
No worries, I have discovered my own DTS pass thru workaround that seems to work like a charm! See the DTS work around below.
Back to capping bit rate. In the advanced settings in Handbrake add the following to the h264 settings:
:vbv-maxrate=35000:vbv-bufsize=5000
On the main video page select Average bitrate and set it between 14000 - 24000
While this is not a "fix all" for all sources, its works a lot of the time. My last option is to re-encoded with plain MPEG-4 (part 2) Under Video Codec: MPEG-4(ffmpeg) please note using this method will not allow my DTS passthru trick.
DTS Pass Thru work around:
You have already created your muxed m2ts file that contains the original video and audio.
1. Put the muxed m2ts back into TSMuxer. You should have two sources, the video and the audio. uncheck the video and "mux out the audio" saving with the name DTS Audio.m2ts.
2. Back to the original m2ts. Bring that file into Handbrake. What your doing here is re-encding the file without the audio. So go into the audio prefs and de-select any audio source. Set you encoding prefs and save as a MKV with the name Video.mkv
3. Open TSMuxer and add both Audio.m2ts and Video.mkv and mux them back together saving with the name of the movie. That it!
Saturday, April 11, 2009
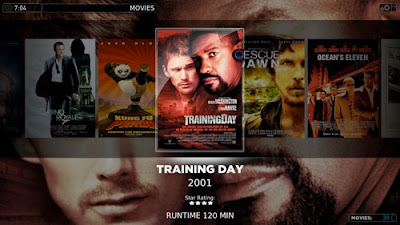
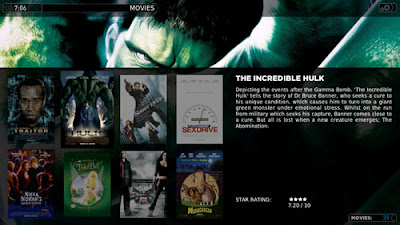
PLEX
Plex Media Center for OS X
Plex bridges the gap between your Mac and your home theater, doing so with a visually appealing user interface that provides instant access to your media. Plex can play a wide range of video, audio and photo formats as well as online streaming audio and video. The real power of Plex is found in its library features: Organize your media into versatile libraries, automatically retrieve metadata from the Internet, and display your libraries using one of the visually stunning skins.
Plex, ROCKS. I am so happy I found this app. It play just about any file format out there, but really shines with Blu-ray m2ts files and if need be re-encoded files saved in an mkv.
The app also works with some great plugins. Hulu and netflix are just two of my favorite.
Gotta check out plex


Tuesday, March 31, 2009
Running Windows On The Mac

One thing I faced early on was installing Windows on my Mac. It is fairly straight forward process with the use of BootCamp. One of the requirements of BootCamp is an install of Windows XP with service pack II. Years ago a had purchased Windows XP for my home built PC, but service pack II was not part of it. So I needed to create a Windows Install CD with at least Service Pack II on it. I found some great instructions on how to Slipstream Windows XP Service Pack 3 to Create an Integrated XP Setup Disk with SP 3. Your gonna need that old PC or maybe a friends PC to do this.
If you already have a Windows Vista or Windows XP w/SP2 then your ready to go!
1. Under OSX launch Bootcamp Assistant (located in your utilities folder)
2. Create a partition for windows.
3. Install Windows
One thing: When setting up Windows during the install you need to make sure you format that partition as NTFS.
Once in Windows drop in your OSX install CD to install some drivers. Do your updates with apple and with Microsoft.
Booting between OSX and Windows is easy. Hold option key down during startup and select which to boot from.
Monday, March 30, 2009
Blu-Ray Ripping Tutorial
Once you have read Blu-ray Ripping What You'll Need you can use this step by step tutorial to rip your Blu-Rays.

1. Use AnyDVD HD to rip the BD. After inserting the BD into your Blu-ray drive AnyDVD HD will take a moment to strip off any copy protections enabling you to backup the BD to your HD. At this point you can go into the AnyDVD HD program folder and launch AnyDVD Ripper and rip the BD to HD.
2. Use BDinfo and and load the "playlist" folder located in the BDVM folder. This will give you the correct playlist to load into our next step with TSmuxer. Find the appropreate playlist and make note of it. I just open a note pad file and save in in the same place as the movie files. Now we can get out of Windows.
3. On the Mac launch TSMuxer and load the playlist. Uncheck all the stuff you dont need. Presentation graphics, extra audio tracks/languages and sometimes even the non HD version of the movie.
One thing to note: The primary audio track of most BD are DTS-HD or TrueHD, currently it is best to 'downconvert' these to reg. DTS or AC3. Now select the file type and destination, save as m2ts. the resulting file will be between 14gb and 30gb depending on the movie length and current encoding.
Play the movie in Plex or XBMC. (Mac Mini 1.83ghz would be my suggested minimum for playback)
Wanna make the file sizes smaller or easier to playback on weaker systems? You'll need to re-encode. check out the rest blog for encoding video with Handbrake.
Bluray Ripping On The Mac: What You'll Need
 For bluray disc reading I purchased an SATA LG GGC-H20L Bluray HD drive and put it in an Vantec NST-530s2 external USB2.o enclosure.
For actual ripping of the Bluray disc I had no other choice than to install Windows XP on my MacBook Pro using Bootcamp. I purchased a copy of AnyDVD HD for the actual ripping and then use TSmuxer for getting the main feature into one full quality .m2ts file. TSmuxer runs on Windows and Mac OSX.
I also use BDinfo (Windows only app) to find the correct playlist on the bluray to load into TSmuxer.
Once done you get a full quality rip from the bluray.
File sizes can range from 16GB - 30GB depending on the movie length and encoding.
You can use the full quality m2ts file or re-encode the file to something a little smaller.
Will discuss bitrate and picture size in future post.
My Mac Mini 1.83GHZ Core 2 Duo Home Theater

In my new search for full 1080p playback I decided to purchase a Mac Mini for my new setup. I ended up with a 1.83ghz model with a core 2 duo.
RAM:
I decided to upgrade the ram to 4GB. This is a model 2,1 mac mini meaning it will see all 4GB but only use around 3,2gb of it. Unlike the earlier version of the 1.83ghz model 1,1 which would only see and use 2GB. I bought my ram from OWC, 4.0GB 2GB + 2GB set I will post a video and links on how to open the Mac Mini up for upgrading the ram.
Hard Drive Storage:
The 5200 rmp 2.5" internal 80GB drive is not really the best for storing or even plying back 1080p video. As I already had a 1TB SATA hard drive from my recently dead PowerMac, I decided to pick an USB2.0/FW hard drive enclosure and put it in there. The NewerTech MiniStack was the enclosure I went with. Good reviews and seemed solidly built and functional.

My Plasma TV:
Is a Panasonic TH-42PZ80U and average 42" plasma TV and is mounted on my wall. Its a full 1080p HD TV with 3 HDMI ports (2 on back one on front)

HandBrake
This is the app that I've been using to convert my DVDs, or any video file into an AppleTV ready format. Personally I think this is the best and easiest app for DVD ripping/encoding for the Mac. (Not currently that great for HD conversions. Has trouble with Bluray ripps (.m2ts files) DTS audio tracks. Can NOT ripp a Bluray Disk either. Can however encode m2ts files with AC3 audio tracks.
HandBrake is an open-source, GPL-licensed, multiplatform, multithreaded video transcoder, available for MacOS X, Linux and Windows.
Supported sources:
Any DVD-like source: VIDEO_TS folder, DVD image or real DVD (unencrypted--protection methods including CSS are not supported internally and must be handled externally with third-party software and libraries), and some .VOB and .TS files. The VLC media player will take care of things there. It is used in conjunction with Handbrake.
File format: MP4, MKV, AVI or OGM
Video: MPEG-4, H.264, or Theora (1 or 2 passes or constant quantizer/rate encoding)
Audio: AAC, MP3, Vorbis or AC-3 pass-through (supports encoding of several audio tracks)

AppleTV

AppleTv is great for viewing 480p and even some 720p content. I started with an AppleTV back in October 2008. While home movies, 480p and 720p HD are perfectly suited for the AppleTV, 1080p content is not currently possible on the AppleTV. DVD playback from a connected Mac is not possible either. All DVD sources must be ripped and converted into .m4v format.
How I used my AppleTV:
I bought the lower end AppleTV with a 40GB harddrive, with no intention of actually storing anything on it. Instead I opted to use and old PowerMac G4 for use a "server" or shared library via itunes. This is a great way of working with the AppleTV. No syncing needed in order to use the server. While you do need to have the AppleTV sync'd to a Mac, that Mac does not need any content on it. My AppleTV is actually sync'd with my personal computer, a MacBook Pro. I have it set to not sync anything. no photos, movies, tv shows... nothing.
What does this mean? Well you don't have to wait for your content to sync MBP iTunes to AppleTV. Large movies can take along time to transfer over wifi.
There are other ways to provide content for your AppleTV too, the server just worked best for me as I had a sort of old and unused computer lying around. You could even us a PC with Winblows (Windows) as a server. Windows XP would work just fine.
You could get an Airport Extreme and attach a USB Drive to store content on as-well. Or you could even by a 500GB or 1TB Time Capsule
I think the point here too, is that even if you get the 80GB AppleTV eventually you are going to need more storage. Within three months I accumulated over 350GB of video. So plan accordingly for future expansion.
DVDs:
So you have lots of movies on DVD but no way to play them. Well this was a must for me. I've got kids, 3 of them! DVD and kids don't mix! They throw them, they lick them, they scratch them and they stick them in places that DVDs just don't go... not to mention the DVD player itself, cards get put in there and anything else thin enough to get shoved in the tray. Anyway, having your DVDs ripped and converted into AppleTV ready files is the way to go. How do you go about doing this. Handbrake! Handbrake is a free software that allows you to ripp a DVD straight into an m4v file. Simple and easy. Nothing else to buy, no rocket science, just a bit of time to make the conversion. On the Mac side there is not better software, and it's free.
You can get Handbrake here: Handbrake
Conclusion:
AppleTV actually does a-lot more than I have explained. From getting on the Web to view YouTube, view your Mobile Me content, Flicker, podcasts, movie trailers and itunes movie/TV store. It's a fun and fairly easy to use Home Theater. The biggest drawback for me was you can't playback 1080p content on it. Compressed 720p @ 5mbs just didn't do it for me either.
Subscribe to:
Posts (Atom)
